facebook

Visit Facebook page!

follow on facebook to get instant news and updates.

Monday, 23 December 2013

iOS 7 Compatible Jailbreak Apps and Tweaks

ios-7-jailbreak
The release of the evasi0n7 jailbreak for iOS 7 – iOS 7.0.4 has taken many of us by surprise, including Cydia developers, so even though you may have successfully jailbroken your iOS device it is advisable to proceed with caution as many jailbreak apps and tweaks are not compatible with iOS 7 currently.
pod2g has also tweeted that jailbreak apps and tweaks relying on MobileSubstrate may have issues and has advised jailbreakers to avoid installing them for now. They’re working on a fix.
We thought it may be a good idea to keep tab of the list of compatible jailbreak apps and tweaks to your life a lot easier. It also looks like some apps don’t work on iPhone 5s probably because of the 64-bit A7 chip, so we’ve also mentioned if a tweak doesn’t work on a device.
So here’s the initial list of jailbreak apps and tweaks that are compatible with iOS 7 – iOS 7.0.4.
iOS 7 Compatible Jailbreak TweaksComments
2×2 Folder icons
Acceleratedoesn’t work on iPhone 5s
Accentify
Activator (beta version)You need to add Ryan Petrich’s repo rpetri.ch/repo to install the beta version.
afc2add
AirDrop Enabler 7.0+
Appinfo
Browser Changer
BytaFontdoesn’t work in all apps
CarrierPigeon
Color Keyboard
DeleteMail
Emphasize
f.lux
FakeClockUp
Fakeclockup
FastrRespring
FireWall iP
Five Icon DockLayout broken due to IconSupport for functions, doesn’t work on iPhone 5s
Five-Column SpringBoardLayout broken due to IconSupport for functions
Flipswitch
FolderCloser
Front HDR
Gridlock
HarlemShake7
iBlacklist
iBlank
iCleaner
iCleaner Pro
Icon Renamer
Iconoclasm
iFileRegistration fails (due to relying on Cydia to check if purchased) but works otherwise.
iKeywi
iPhone4Parallax
KillBackground7
Lyricalizer
MobileTerminal
Movie Box
Music Box
Mxtube
My3G
MyFile
MyWi
Nitrous
No Page Bounce
No Passcode Block
No Percent Sign
NoNewsIsGoodNews
NoPasscodeBlock
NoPowerDown
NoStoreButton
OverAchiever
PkgBackup
Plugication
Poofdoesn’t work on iPhone 5s
PreferenceLoader
Privacy
Record ‘n’ Torch
ResetAllKiller
Respringdoesn’t work on iPhone 5s
Safari Resetter
ShakeToUndo Killer
ShowCase
Sicarius
SIGnify
Smart 3G + LTE
snes4iphone
Software Update Killer
Speed Intensifier
Swipe Selection
SwipeShiftCaret
SwipeToRespring
Tethermeworks on iPhone 4s and iPhone 5
Unrestricted Folders Naming
WelcomeMe
WhatsPad
WiFi Analyzer
WiFi Boosterdoesn’t work on iPhone 5s
WiFi Passwords
YouTubetoMP3


How to Jailbreak iPhone on iOS 7 – iOS 7.0.4 using evasi0n7

evasi0n jailbreak
evad3rs gave us a big surprise earlier today by releasing evasi0n7, the eagerly awaited jailbreak for iOS 7 – iOS 7.0.4.
In this guide, we will take you through the step by step procedure to jailbreak your iPhone running iOS 7 – iOS 7.0 using evasi0n for Mac and Windows.
Here are some important points to note before you proceed.
  • This tutorial is meant for iPhone users. We’ll publish the tutorial for iPad and iPod touch shortly.
  • evasion performs an untethered jailbreak
  • evasi0n supports iPhone 5s, iPhone 5c, iPhone 5, iPhone 4S and iPhone 4.
  • Important: Please do not forget to backup your iPhone to iCloud or iTunes before you proceed.
  • Please ensure you’ve updated iTunes to the latest version.
  • evasi0n is compatible with iOS 7, iOS 7.0.1, iOS 7.0.2, iOs 7.0.3 and iOS 7.0.4 (Settings -> General -> About – Version)
  • Please note that jailbreaking your iPhone may void your warranty and hence proceed with caution and at your own risk
  • Please do not jailbreak your iPhone to pirate apps from the App Store.
  • Warning: We’re hearing some users having problems using the jailbreak, so you may want to wait for evad3rs to release an update which fixes the initial bugs.
Step 1: Download the latest version of evasion jailreak, evasi0n7 from link below  and save it in a folder named “evasi0n” on your desktop.
Step 2: Double click the downloaded file and extract the application to the evasi0n folder. Navigate to the evasion application and launch it.
Windows users: Please launch the application as an Administrator. Right Click on the evasion exe and select the “Run as Administrator” option.
Step 3: After launching evasi0n, you will be prompted to connect your iPhone.
Step 4: Please disable the passcode as the jailbreak may fail, if the passcode is enabled (Settings -> General -> Passcode Lock On -> Turn Passcode Off).
Step 5: After the passcode is disabled, connect your iPhone to the computer. evasi0n should detect your iPhone and also mention the iOS firmware that is running on it. Click on the Jailbreak button.
evasi0n7-howto-iphone-1
Step 6: After clicking on the Jailbreak button the tool will give a progress update on the various stages of the jailbreak process such as:
  • Retrieving remote package
  • Uploading jailbreak data
  • Injecting evasion app (1/2)
  • Injecting evasion app (2/2)
  • Configuring system (1/2)
  • Configuring system (2/2)
  • Rebooting device
Please wait patiently while the jailbreaking process is running, don’t start iTunes or Xcode in the meanwhile.
Step 7: Once your iPhone is rebooted, you will get a message informing you to unlock your iPhone. Do not close the evasi0n application.
evasi0n7-howto-iphone-2
Step 8: Unlock your iPhone and then tap on the evasi0n 7 app (the one with the evasi0n 7 icon).
evasi0n7-howto-iphone-3
Step 9: When you launch the evasi0n app, the screen will go white and reboot again.
Step 10: The rest of the jailbreak process will now take place on your iPhone. After you iPhone reboots, you will see a large evasi0n logo with messages informing you on the status of the jailbreak process such as:
  • Reading kernel
  • Calculating offsets
  • Setting up packages
  • Setting up Cydia
  • Continuing with boot
Step 11: After it has rebooted, you’re done. It has been successfully jailbroken and you should be able to find the Cydia icon on your iPhone’s home screen  (it may not be on the first page so search for it to locate it).
evasi0n7-howto-iphone-4

You can donate money for there and our hard work at paypal @rmathrau@gmail.com
Download links:

Friday, 20 December 2013

Dual-SIM HTC One With MicroSD Card Slot Announced

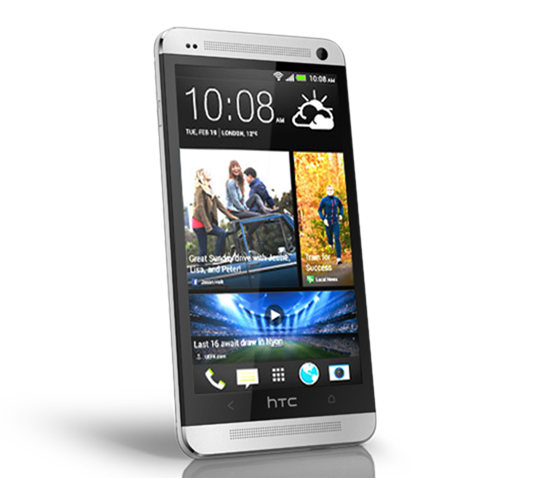
Dual-SIM smartphones seldom see the light of day in the western world, but the newly-updated HTC One includes two SIM card slots – ideal for frequent travellers, business and pleasure separators or those leading double lives. It’s about to hit the UK market for £494.99, which is just a fraction more than the standard edition, and for those who’ve been waiting for a decent dual-SIM handset to hit the scene, the highly revered HTC One is probably your guy.
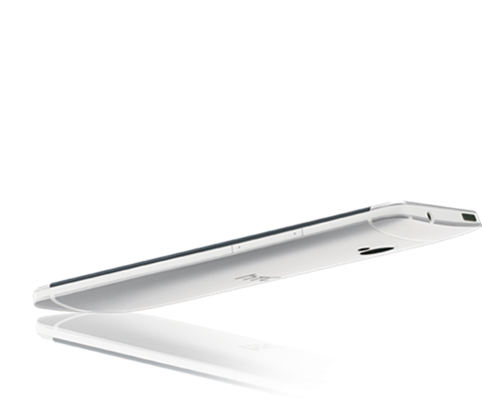
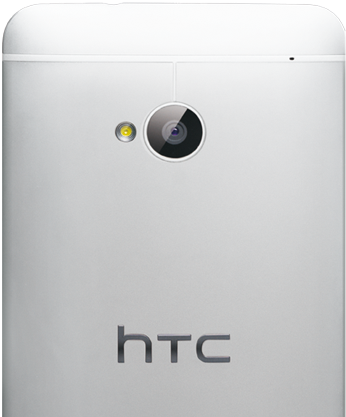
Perceived by many as the best smartphone to release this year, the HTC One provides the high-end specs and large display of devices like the Samsung Galaxy S4, while also incorporating the à la iPhone finesse thanks to its precise aluminum finish.
HTC-ProductDetail-Dual-slide-01
When I first purchased the one, finding the black color configuration was difficult enough, let alone any edition with 64GB of storage space. But as time has progressed, HTC has looked to broaden its horizons, and with a few funky colors, as well as a Mini version now in circulation, it’s fair to say that the Taiwanese company’s efforts to change its fortunes around in the smartphone market have been somewhat successful.
The new HTC One not only offers two SIM slots, but also a microSD slot, which will allow you to expand the device’s memory up to 64GB. The lack of a microSD facility was seen by some as justification for picking the Galaxy S4 over the One, but since the back cover can now be removed, those looking to add a SIM card or a bit of extra memory can do so with ease.
HTC-ProductDetail-Hero-slide-03
The handset is, according to HTC, aimed at those travelling around, but one suspects there’ll be quite a vested interest in what is the first popular high-end handset to offer two SIM slots in the UK.
While the Dual-SIM version sports quite a few changes, that beautiful aluminum chassis is preserved, and you get those ridiculously loud and clear front-facing speakers to boot.
HTC-ProductDetail-Hero-slide-05
The only real caveat is that there’s no LTE support, which is a massive drawback when one considers that almost every high-end device allows users to connect to 4G networks. Also, there’s no Android 4.4 KitKat from the get-go, so until such time as an update becomes available, you’ll have to stick with Jelly Bean.
It’s unknown as to whether the handset will be hitting other areas such as the United States, but as soon as we hear any further details, we’ll be sure to let you guys know!

This iPhone 5 Case Brings Dual-SIM Capabilities To The Device [VIDEO]

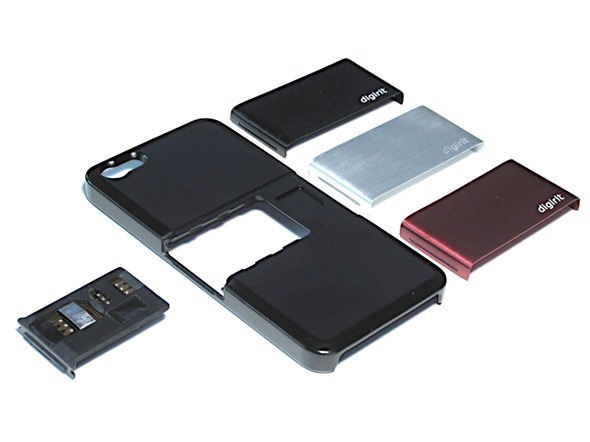
A new start-up project out of Taiwan is reliant upon your backing in its quest to bring its concept of a dual-SIM-capable cover for the iPhone 5. Known as the SIM+, it will allow you to run two SIMs at any one time, with effortless switching between them, and with a slot to carry a third, it’s the ideal accessory for the frequent traveller.
In the West, owning a dual-SIM device is a rather idealistic prospect. Such variants of handset are rife around many parts of Asia, such as Taiwan, where this project originates from, but save for the dual-SIM HTC One, which recently made its debut in the United Kingdom, the luxury of having two or more SIM cards inserted onto a single device is something of a rarity.
1378787312_sim .027
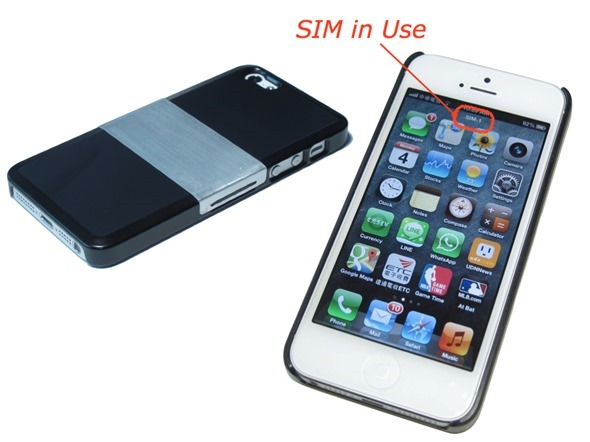
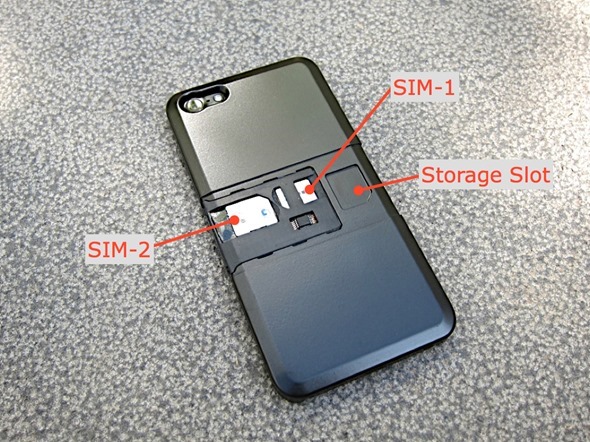
One start-up aims to turn the situation on its head. The Digirit team has come up with a case that allows two SIMs to be inserted into an iPhone 5, with almost seamless configuration and switching from within the Settings app.
Once you’ve applied the cover and placed inside the SIMs you wish to utilize (there’s a handy storage unit for an additional third SIM if you wish to throw a party), you’re good to go. As demonstrated in the video below, all you need to do is head to Settings, select which SIM you would like to use, and within 45  seconds to one minute, the switch is complete.
1378787437_sim .037
Sure, it’s not saving a great deal of time considering that you could probably manually switch your SIM in less time, but the hassle of retaining that second (or third) SIM, as well as having to find a paper clip or similar to eject the tray, means that this cover from Digirit is far more practical and convenient.
1378787634_sim .0103
Ideally, we would love to have seen support for the latest and greatest iPhone 5s, but hopefully, this is in the Digirit team’s long-term plans, pending the success of this current configuration.
The SIM+ is currently a project on crowd-funding site HWTrek, which works in a very similar fashion to Kickstarter and Indiegogo.
It is looking for a backing that totals $40,000, and if you’re interested, be sure to check it out at by heading over to this link.

Thursday, 12 December 2013

How To Wirelessly Charge Your iPhone [VIDEO]

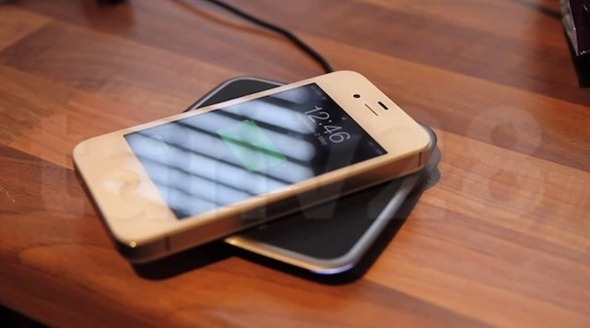
If you’ve been longing for the immensely cool and "futuristic" ability to charge your iPhone wirelessly, you may be waiting a while for an official solution from Apple. However, a tinkerer who goes by the name of Tanveer took apart a wireless charging case for the iPhone and installed its components into the iPhone 4S chassis itself. If you have a bit of patience, a lot of soldering skills, sufficient knowledge of the iPhone’s internals to disassemble, modify, and reassemble, and you don’t fear breaking your iPhone by mistake, then this would be a fun project of you. The entire process is briefly touched on in a three minute video released by Tanveer.
screen-shot-2012-07-05-at-3-15-16-pm
On top of the aforementioned skills, you will need a Powermat wireless charger (another could theoretically work, but this particular tutorial is centered around the Powermat), a spare iPhone back panel, a spare charger port assembly, and extra thin wire gauge. You will have to solder the wire gauge on pins 16, 23, 25, and 27 on the charger assembly port. Then, you’re going to have to connect them to the wireless receiver you knicked from the Powermat. Connect Pin 16 to 0v or ground, pin 23 to +5v, pin 25 to data-, and pin 27 to data+.
Assuming you managed to do all of this correctly, you should then have a working, wirelessly chargeable iPhone! Now, you need to test your masterpiece before fully reassembling everything and installing the rear panel again.
Now of course, as I mentioned earlier, you can run the risk of permanently damaging your iPhone, and of course, voiding your warranty. So, this is more of a fun hack to perform rather than a practical solution to the lack of wireless charging. However, if you still want to do it for fun and have a spare iPhone laying about, it could make for a fun project. But, if you want to live life on the edge and do this on your main device, you have been warned!
Some sort of official wireless charger from Apple would be awesome, but there hasn’t been any credible news or rumor to even suggest that it’s coming in the next iteration of the iPhone.
(via CultofMac)