facebook

Visit Facebook page!

follow on facebook to get instant news and updates.

Sunday, 11 October 2015

How does iOS 9’s Low Power Mode extend iPhone’s battery life

Low Power Mode - Feature
One of most useful features in iOS 9 is the Low Power mode, which extends battery life by an additional 3 hours.
Low Power Mode can be enabled manually at any time through the Settings app, and you get an option to enable it when you get an alert when 20 percent and 10 percent battery is remaining. Once enabled, you can either disable it manually, or your iPhone will turn it off automatically when it hits 80 percent charge.
Low Power Modes comes at a cost. According to Apple, the Low Power mode reduces performance and multitasking activity to extend battery life. When it is turned on features like Mail fetch, Background App refresh, motion effects and animated wallpapers are disabled.
How does Low Power Mode extend iPhone battery life?
So what does it mean in real world situation? We take a look at the actual cost of enabling Low Power mode on your iPhone.
  • Screen Brightness: It slightly lowers the screen brightness. You can, however, increase the screen brightness manually if you don’t like it.
  • Auto Lock: It locks the screen automatically after 30 seconds. You can’t change this setting.
  • Background App Refresh is disabled so that apps won’t update the content in the background. The content will get downloaded only when you launch the app.
  • Mail: Push and fetch for emails is disabled. So you won’t get a notification for a new email. The only way to check for new emails is by launching the Mail app.
  • Automatic Downloads: It also disables automatic downloads. So new purchases made of other devices and app updates are not downloaded automatically. You will need to download them manually.
  • Visual effects: It seems to tone down the visual effects. So things like the parallax effect of icons, Dynamic Wallpapers, perspective zoom of wallpapers are disabled.
  • Performance: One of the things, that may come as a big surprise to most users is the performance degradation. With Low Power mode enabled, iPhone 6s Plus got a single-core score of 1465, and a multi-core score of 2491 when we did the benchmarks using GeekBench 3.0, compared to the single score benchmark score of 2510 and 4360 without Low Power mode enabled (higher scores are better). To get some perspective, based on the benchmark scores, the iPhone 6s Plus runs as fast as the iPhone 5s in Low Power mode.
Normal vs Low Power mode - benchmark scores
Benchmark scores – Low Power mode disabled (left) vs. Low Power mode enabled (right) 
  • Always-on “Hey Siri” feature that is available on the iPhone 6s and iPhone 6s Plus, which allows users to use “Hey Siri without connecting the device to a power source, is also disabled in Low Power Mode.
Apple has smartly implemented some of the battery saving tips and tricks in Low Power Mode to get more battery life. The thing I like most is that it doesn’t turn your iPhone into a featured phone to extend battery life. It still feels like you’re using the iPhone, and for most activities you don’t feel the performance degradation.
I end up putting my iPhone in Low Power Mode when I’m going to sleep, and can’t charge the device. It ensures that there is enough charge left when I wake up.
It would have been perfect if Apple offered an option to enable or disable it via the Control Center or in my case, offer an option to schedule Low Power Mode. For now, I use Siri to turn Low Power Mode On/Off

How to get the iPhone 6s Selfie Flash on any iPhone

How to Get the iPhone 6s Selfie Flash on Any iPhone

Go to the App Store and search for “front flash: selfie camera” and select the app with the baby blue icon created by Wanaka Mobile LLC. The app is called, Take Selfies Free – With Front Flash In Low-LightI’ll be using this app with my iPhone 5s.
App - Selfies
After downloading the app, open it up. The app is ad-supported so will see a few banner ads during each session of use.
The app works by mimicking the same front-flash actions that appear on the iPhone 6s and 6s Plus, where your screen becomes the flash. The app has a timer in the corner that you will tap. The countdown is 3 seconds, so beautify yourself quickly.
Selfie - Timer
After those three seconds, the front of your screen will flash to help add light to your selfie. Please note that, the brightness of this flash is based on the brightness of your display. The lower your display brightness, the lower intensity the flash will be. So, of course, if you need more light, increase the screen brightness to its max.
Brightness - Toggle
Now, let’s take a look at the comparison below. I shot both images in our kitchen with very little lighting in the room. The image on the left is from the stock Camera. The image on the right is from the Take Selfies Free app. Without question, Take Selfies Free added enough light to at least make my face visible. Without the front screen flash, the default Camera cannot overcome the darkness at all.
Take Selfies v Camera
So there you have it. That’s how easy it is to get the iPhone 6s “selfie flash” on any iPhone. Of course, it is not the same as the technology Apple has used in the new iPhones, which comes with a special display chip that allows the display to flash three times brighter than usual, but as you can see it is better than nothing.

Friday, 26 June 2015

How to Make Your Stencils in Photoshop

This is a way for making stencils that i use fairly frequently and it works very well for 2 or 3 layer stencils depending on if you want the background to be one of the layers or if you want to cut and spray another. This way of making the image doesn’t work on all pictures and is just another way to get the layers instead of using cutout or another way.
1. First open your image, you want just the picture you are making into the stencil with no background stuff.11

2. Duplicate the layer and make a layer mask like the picture shows


You can throw away the background layer after you do this. copy the layer after it has the mask and click the little eye next to the layer to make the top one dissapear and then select the bottom layer
3. Next you want to open the threshold box like this:ll


And then set it fairly high so that you get an image with a high concentration of black that looks something like this:

4. Next you need to select the black by using the select color range tool:


after that select shadows by doing this:


5. Now you have to fill the black with a dark color that is not black. i’m using dark red because i like the color. to fill in what you selected do this:

then make sure it is on foreground color and hit ok and all the black becomes whatever dark color you had set as your foreground color.
6. Now that you have the bottom layer colored you need to highlight the top layer and use threshold to do that same as you did with the bottom layer but a lot less black like so:

7. After you do that then go back to select color range and select highlights instead of shadows. set your foreground color you a lighter shade of the one you used as the black on the bottom layer and fill it.


Now change that drop down bar that the arow is pointing at from normal to multiply and TADA! you got a 3 layer stencil


8. (This is optional but i do it so i don’t waste color ink and it’s easier to see to cut) now you wanna desaturate the layer so you get only black and white and grey. so do this (if you don’t know how then i guess you gotta learn sometime Rolling Eyes )11


9. Now you want to change the levels so you get a white background and then your done:12


This is how i make most of my stencils now and I’ve never really heard of anyone on this site using it and tell so here’s a pretty fool proof guide on how to do it. I added all the pictures and stuff because when i first did it i only got it explained to me loosely and it made it so it gave me problems so this should circumvent that problem. This is my first tutorial so give me some slack.

Monday, 11 May 2015

HOW TO USE ANDROID PHONE AS PC SPEAKERS

Use Android Phone As Wireless Speaker

Here, is a quick tutorial to use Android phone as PC speakers. Many a times it happens that you want to listen the sound played on your desktop which doesn’t have the speakers connected to it. Also, there are situations when your laptop inbuilt speakers stops working and you want to listen to the audio or video being played on your laptop.
For this, you now use your Android speakers as external speakers by wirelessly connecting your Android phone with your PC. For this, we will be using SoundWire app for Android. SoundWire app allows you to wirelessly connect your Android phone via PC and use Android speakers as PC speakers to play sound from PC to Android. The app works great on Android phones.

Steps To Use Android Phone As PC Speakers:

Step1: Download and install SoundWire app on your Android phone from Google Play Store. 
Step2: Download and install SoundWire PC client for your Windows PC. Select the appropriate one according to the operating system you are using; Windows 7 or Windows XP.
Step3: The PC client will be downloaded in the Zip format. Unzip the PC client file using unzip software and then launch the SoundWire PC Client.
Step4: Connect your Android phone and Windows PC on a same Wi-Fi network.
Step5: Launch SoundWire app on your Android phone. You will be prompted to enter the server address.
Step6: Copy the server address from the PC client of the app and then enter it into the app on your Android phone.
Step7: Tap on the SoundWire app icon and to connect it via PC client.
Step8: The Android app will then start communicating with PC client installed and get connected.
Step9: Now, play a song in windows media player or any other media player on your Windows PC to start listening to them on your Android speakers.

Samsung Galaxy Note 5 / Note 5 Edge Specs Leaked

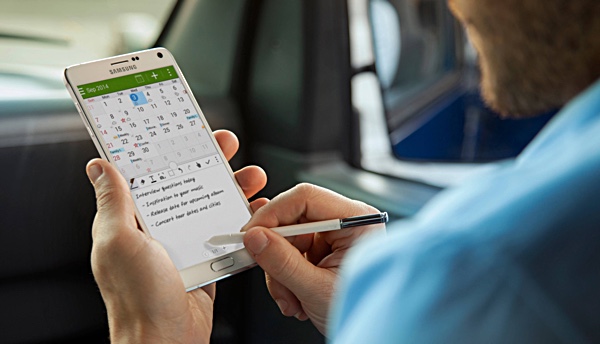
You don’t have to be any kind of rocket scientist to know that a Galaxy Note 5 is going to follow the existing Galaxy Note 4 out of Samsung’s product catalogue, and with pretty good reason too. The Note line of smartphones – or phablet, depending on what you really want to call it – tend to be hugely popular amongst both giants and people who simply like to have plenty of screen space and don’t have to worry about such practicalities as fitting it into a pocket or, you know, not needing some sort of a pulley to pick it up. The Galaxy Note 4 is due to a refresh fairly soon, so the Galaxy Note 5 should theoretically be on the horizon.
And on the horizon it is, if you believe the current rumors coming out of SamMobile.
Galaxy Note main
The interesting news here isn’t that a new Note is likely to arrive this year, but actually what it may contain. According to its sources, SamMobile is pegging the new Note 5 as having either a 2K or 4K screen and an Exynos 7422 processor. It’s apparently possible that an Exynos 7430 may make an appearance as that is said to be in testing also, though not currently the forerunner.
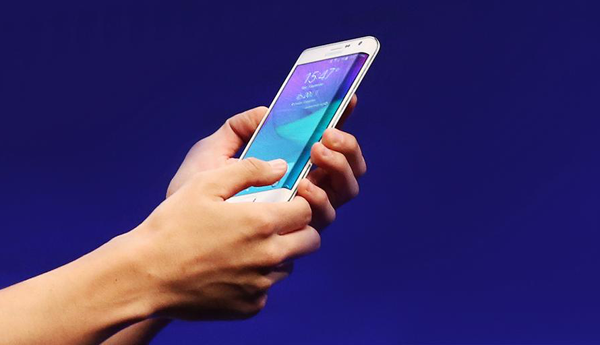
Even more interesting than that though is the news that Samsung may be about to offer a curved Note handset for those who want something a little bit larger than the Galaxy S6 Edge. Rather than simply bringing a curved version of the Galaxy Note 5 to market though, Samsung is believed to be about to launch a curved screened Galaxy Note 5 that doesn’t bear the Edge moniker and importantly, comes with a different sized screen and lower specifications than its flat brother. Expect a 5.5-inch or thereabouts screen and hexa-core Snapdragon 808 chip if the rumors are to be believed.
Galaxy-Note-Edge-main.png
Galaxy Note Edge
With an expected September launch time-frame, the two new phablets should be starting to leak more and more as time progresses so we’ll keep our eyes peeled. At this point it’s the curved variant that has our attention the most, but that doesn’t mean the Note 5 isn’t going to catch our eyes either.
Time shall tell just what Samsung has in mind.